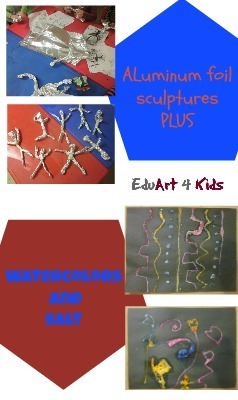
This post is a combination of two of the art classes that I have been running with a group of first graders.
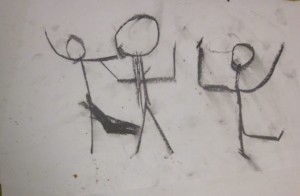
I began lesson 9 with trying to show the children the different positions that people can be in and to show them how they can draw them in stick figure forms. I used a Wooden Human Mini Mannequin for them to try and copy. I saw that it wasn’t so easy for them to copy this mannequin.
We did some basic poses and I had them make stick figure people.
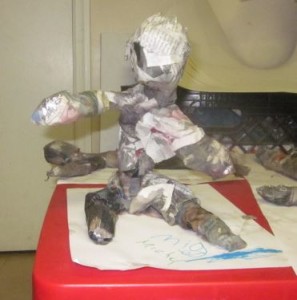
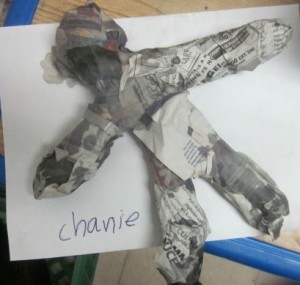
We didn’t spend much time on that but, we then started making out own simple people out of aluminum foil.
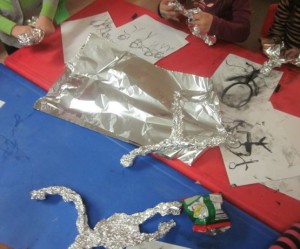
The point was really for them to put these aluminum foil people into different positions and then draw the positions but, I saw that it really is beyond this age level to do that too much. So we just concentrated on making a human form.
The best way to do this is to take a really long pieces of aluminum foil and scrunch it into a long piece. Then take another piece and scrunch that into the head and push it onto the long stick which is to be the body. (you can also use tape as we will be covering this up with paper mache in any case)
Then you make another long stick put it across the middle of the body and cross it over so you then have arms.
Make another stick, put it at the bottom of the body and fold up a piece of the aluminum foil from the body over the bottom piece which turns them into legs.
Once you have all these set, then you can position the sculpture into any position you like. (if this is not clear, let me know in the comments and I will photograph the exact directions them and add them to this post)

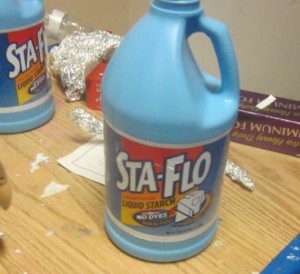
The next week we were ready for the paper mache. I recently discovered from some blog (don’t remember where) that I don’t have to use some of those complicated recipes I talked about in my post on paper mache. Liquid starch works great. I went to my local Walmart and picked up some Sta-Flo Liquid Starch. I think its the only brand of liquid starch that there is. No mixing. Just pour it in and voila! it works as paper mache paste.
This was not an activity that all the kids wanted to take part of. One of the little girls had to leave the room because as she said “she was getting nauseous cuz it was so disgusting”.
Other children had a fine time dipping the pieces of ripped newspaper into the liquid starch and wrapping them around their aluminum foil sculptures.
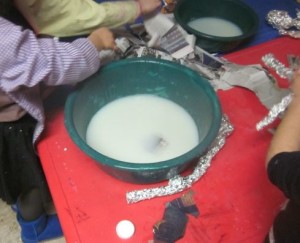
We wrapped them as best as we could and lay them down to dry.
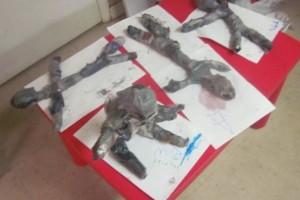
One little girl decided to sit hers up.
Both of these days that we were working on the paper mache were not filled just with making these sculptures. The first week I decided to give them an activity that I saw on this blog on salt and watercolor painting.
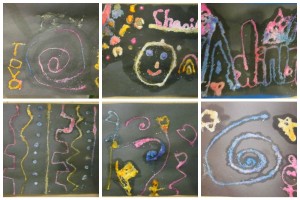
It was supposed to be a short activity while we waited for more of the children to show up but, they had such a good time with it, that they ended up doing a number of pictures and were quite fascinated by the process.
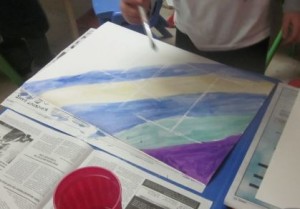
Salt and watercolor painting
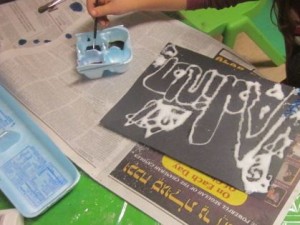
The idea here was to draw with glue.
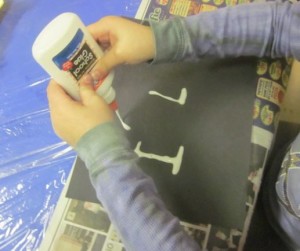
Sprinkle salt onto their glue pictures.
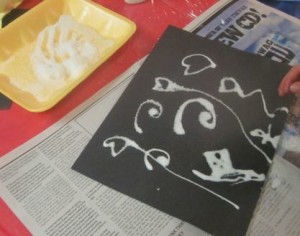
And then use watercolors to touch to the salted glue and watch it spread to the rest of their picture.
The trick was to just touch the paintbrush to the salty glue and watch it drink up the paint.

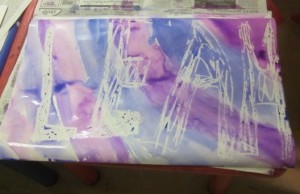
Here is a collage of 6 of the images.
Making portfolios
I also did another watercolor activity with them to create portfolios.
They have been making so much artwork, letting them dry and not taking them home and I knew they needed a way to keep their artwork together.
I gave each of them a large oaktag folded over to make a pocket.
I then gave them white, wax crayons and I told them to color in a picture on each side.
They were then given watercolors to cover over their pictures. The white crayon marks resisted the paint and showed through.
After they were dried. I stapled the sides together and they now each have a large pocket portfolio to store their artwork. (so their parents don’t have to have various painted papers floating around their house).
Thank you so much for sharing these ideas and pictures I run a local playgroup and the alfoil scrunching into simple sculptures will be great fun and I am also keen to try the salt n watercolour painting – not sure about the paper mâché tho…😀 kind regards Melissa