
This ocean crafts activity was inspired by this swarm of sea creatures that I found on Pinterest.
As you may know already, I love mixed media art and I also love when the children get to do their projects in more than one sitting. Even if you’re doing this at home it’s still best to let the first part dry before going on to the next.
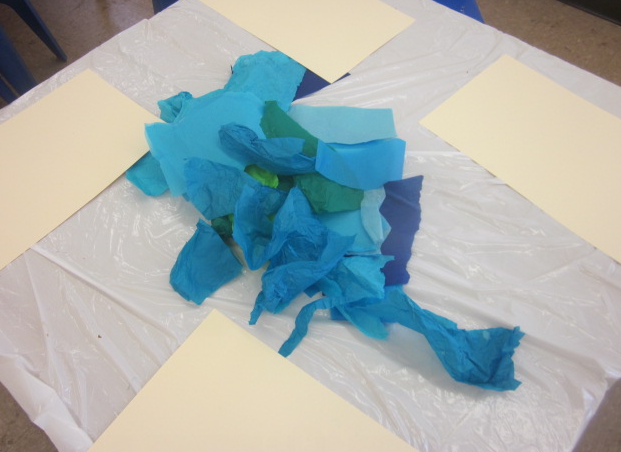
To create the ocean backgrounds I ripped up a few different shades of tissue paper. The reason I ripped it as opposed to cutting it was because I didn’t want them to get hung up on neat lines. It’s also easier to rip to fit the pieces onto the paper. When I ran out of blues they added other colors as well and some of them said they were adding rocks.
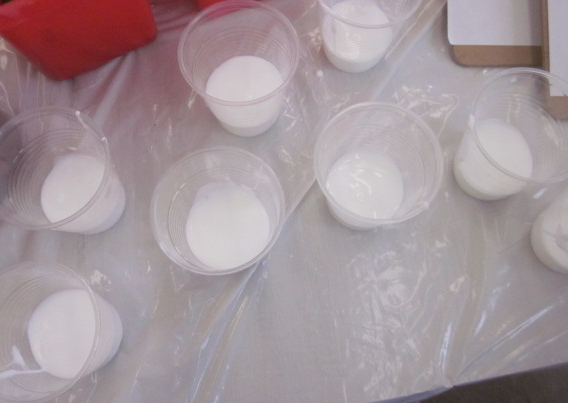
I also gave them glue that was watered down in cups. Glue bottles and even glue sticks wouldn’t work well for this.
It’s much easier to cover larger areas with brushes.
They used regular paintbrushes to first spread the glue over their whole sheet of tagboard and then ripped the various blue pieces of tissue paper to cover their whole space. WARNING: This gets verrrry messy. I was thinking that this is not paint so we don’t need smocks. BIG mistake. 🙂
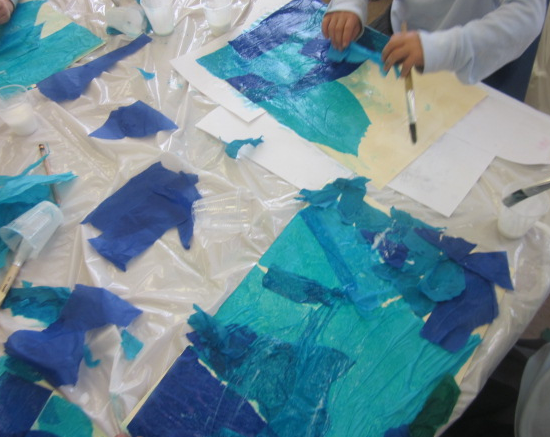
This is the kind of tissue paper that runs and it runs onto whatever touches it.
The oceans were laid to dry after they were done.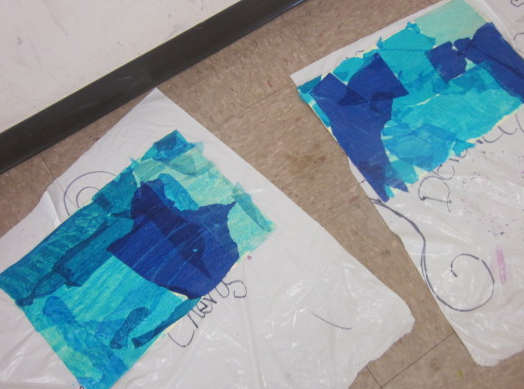
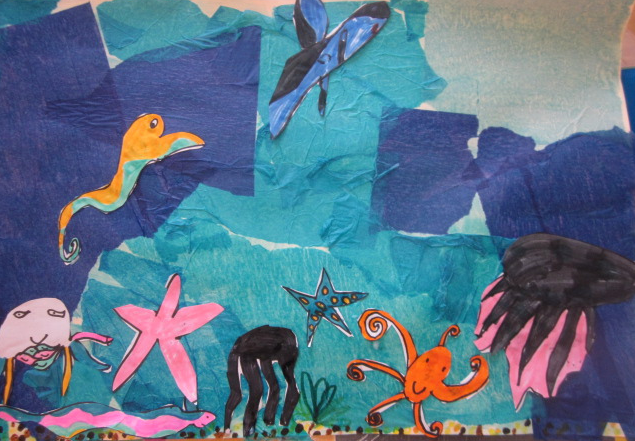
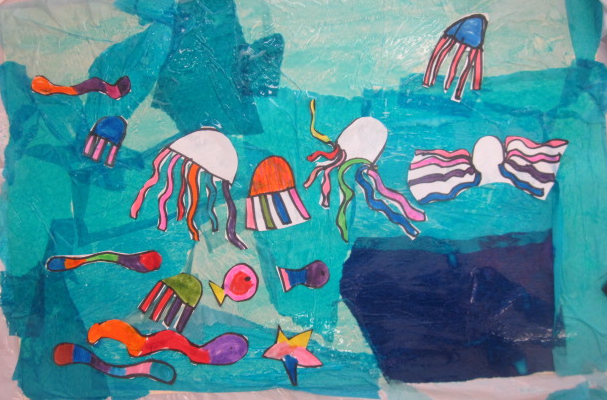
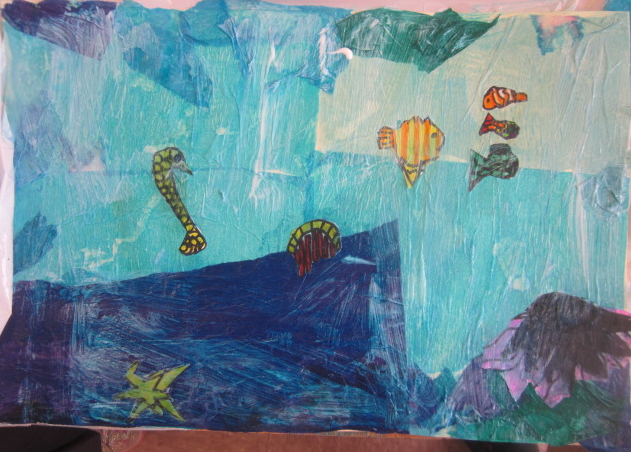
The next part of the activity was to hang up a number of pictures of sea creatures.
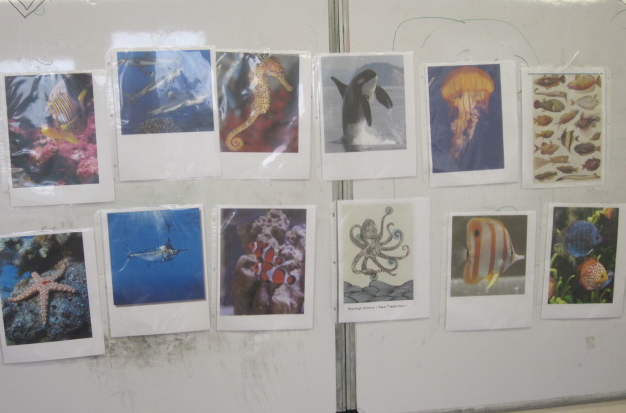
I told them to draw whichever ones they wanted and they were of course, not limited to what I had hung up.

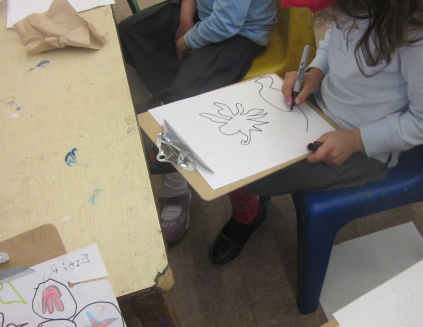
I gave them black sharpies to draw their creatures even though some of the kids wanted to draw in pencil first. The reason I used black (in retrospect I did not have to give them permanent black markers) is because the outlining of the creatures makes is stand out and very beautiful.
They started drawing on the papers which were on the tables and the marker was going right through to the table. I also had no room at the table that was near the images so I got hold of some clipboards for the kids to draw on. This killed 2 birds with one stone. (3 actually)
The tables stayed free of markers, there were more kids able to sit near the images and it made them feel important to use a clipboard.
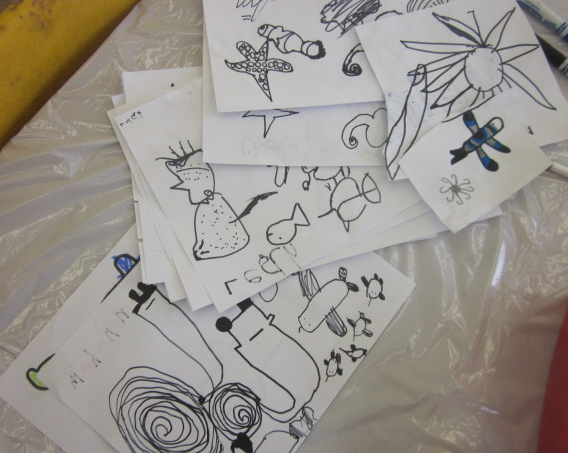
The next part of the activity was to color in the creatures outlined in black markers and to cut them out.
They then had to paste them onto their oceans.
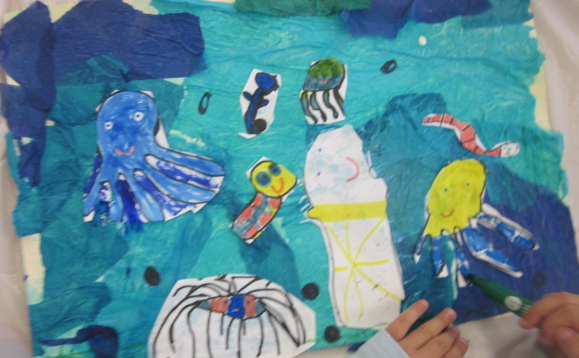

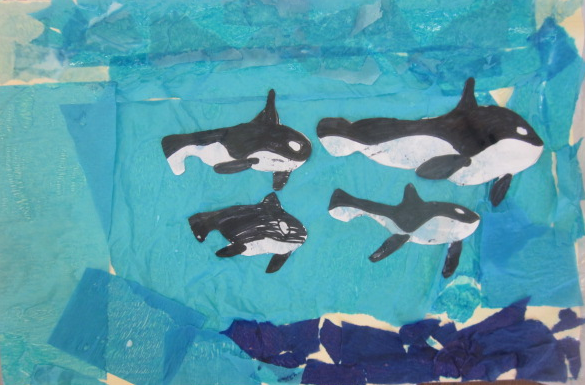
This little girl decided she only wanted whales and created a family of whales in her ocean. (this is only first grade mind you)
After they were done pasting I had them mod podge the whole tagboard. It’s a bit scary to use it at first since it looks thick and white. It does dry clear, however and gives it a shiny look and keeps it more protected.
A great project to do around Summer time (which is just about now in NY)
You check out a different mini murals of the sea post that I did with younger children
Pin to save for later


Looks like a lot of fun. I love the colorful animals against the blue. It really looks pretty.
Thanks. It was fun
Very pretty! I love how this turned out.
I think the black outlines with the deep marker colors is what make it so pretty.thanks
We love art in our home! We enjoy doing similar kinds of mixed-media art projects. It makes my heart smile to see such diverse art by children.
That is a great way of describing it Jeannine, making the heart smile. My heart also feels something when I see kids doing great art and now I know what it is…its smiling 🙂 thanks