
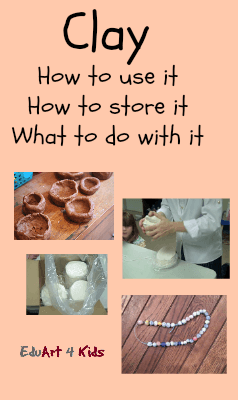
Clay art with modelling clay
Clay modeling, clay art projects, playing with play dough all mean different things to different people. There are three basic types of clay and I discuss the different types of clay in another post along with how to make clay at home or in the classroom.
The clay that I am going to concentrate on here is the one that allows children to model clay in the best way as it is soft and pliable and dries hard and permanent. (I don’t have access to a kiln so will not deal with that aspect)If you do fire your clay and then glaze it you will get a much shinier, finish.
The benefits of clay modeling
The clay I am talking about comes either in 2 lb packs like AMACO Marblex Self-Hardening Clay, 2-Pound, Grey or in a AMACO Stonex Self-Hardening Clay, 5-Pound, White
and for large groups of children comes in 25 lbs. They also come in a few different colors. School Smart Air Dry Clay – 25 pound, Red
and the Amaco Marblex Clay 25lb
which is gray.
Working with this kind of clay is a multi sensory experience. The children love the feel of the mushy clay and it allows them to be dirty and messy in an accepted way. It happens to be that it is a wonderfully therapeutic experience as well.
I have a friend who was teaching preschool and one of her students was a little girl who refused to use the bathroom. My friend, her teacher discovered that the little girls mom was a clean fanatic . As a result this little girl was scared to make herself dirty. My friend started giving this child lots of clay to play with and after a few weeks this little girl was able to use the bathroom.
Playing with the clay gave the little girl the messy outlet she needed and allowed her to free herself up to be able to use her natural functions normally.
Pounding and squeezing the clay allows the children to release many aggressive feelings they may have in a socially acceptable manner. They can pound and press, pinch and knead and even dramatize scenarios.
Playing with the clay is great for children’s large muscle and fine motor coordination as well. The large muscles are used as the clay is solid and gives a lot of resistance. The kids have to use all of their muscles to get it to do what they want. Their fine motor control is exercised as well as they pinch and roll and maneuver the clay to do what they want.
Different types of air drying clay and how to manage it
This clay can be very messy so you may want to use it outdoors if you have the space and the right weather. I used it many times in my classroom when I was a kindergarten and preschool teacher and it just works fine in the classroom. I also used it with my own children in my home. You can have the children use it on the table but, it needs to be sponged down very well with lots of water when you are done. You can use a piece of canvas under the clay and I recently saw a suggestion to use large, ceramic tiles as a clay board. (years ago they sold clay boards but, I haven’t seen them lately)
You also need to take care not to put the leftover pieces in the toilet or the sink as they will harden at some point and clog the drains.
If you want to make the clean up a bit easier you can use clay boards if you can find them (we used to use them years ago and I haven’t seen them in a while) , pieces of canvas or pieces of linoleum. Anything that is large enough, heavy enough and doesn’t stick to the clay will work.
How to cut it
If you look at this picture you will see how to cut it. You need a piece of string, yarn or some kind of wire. As it comes in a big block you will just need to slice off chunks to give to the children.
After it is cut, each child gets a slab. They play with it (more on making stuff a bit later) and when they are done, it needs to be stored properly.
How to store it
After the children finish playing with the clay have them roll into a ball the size of an orange or a grapefruit. Then using their thumbs as shown above they make a small indentation in the ball. Take a small bit of water and pour it slowly into the hole. (really small)


This needs to be supervised closely as the children can drown it with water and it only needs a very little bit. Once the water is in, you gently smush some of the clay with your fingers over the hole.

The children can then lay the balls of clay in a plastic container.

Originally I had learned that when storing the clay you need to first put it into a plastic bag, then put a damp rag over it and cover it tightly in the plastic container. I did however, discover that you don’t need the plastic bag. A wet rag will often also make it moldy.
Clay projects for kids
In our way of educational art, clay is no different than any other medium. Children have to learn to get used to the medium before they can make anything with it. We also don’t expect children to make projects that are copies of adult models or expect them to do clay modelling like children much older then them are capable of. There are basically 4 stages of development that children go through in their clay play that closely mirrors their development in other areas of art.
- Their first exposure to clay is usually an exploration of what it is. They may taste it, smell it, push it, throw it and interact with it without really knowing what to do with it.
- The next stage is where they are learning what they can do with the clay. They can roll, squeeze, pinch, pound, poke, tear, stretch and any other number of things.
- They will start making things and labeling. I made a snake, a snowman or food is common at this stage.
- This is when they come to their clay activities with an idea in mind. They know what they are going to make and accessories are a good thing to add at this stage. You might want to try the SE Pottery Tool
Clay pots, clay beads and clay sculpture
When you are ready to give the children a bit more direction below are 3 ideas of what and how to use this clay.
Clay pots
There are 2 kinds of clay pots you can make with children. The first one are pinch pots.

The way to make the pinch pots is as follows:
- Take a piece of clay about the size of a grapefruit or an orange.
- Roll it into a round ball
- Put it into your left hand (if you are a righty)
- Put the thumb of you right hand in the middle of the middle and start pushing.
- As you push keep turning the ball around
- Eventually a pot will develop as you keep pushing and turning
Interestingly enough everyone’s pots come out looking different (if you notice the image above) even though the technique is the same.
The second way to make a clay pot is to keep making rolled pieces of clay (or snakes as the kids call it) and then keep stacking them on top of each other. To keep them together you may have to rub bits of clay between the rolls to act as a sort of glue. (I have personally never tried this particular activity but, you can see this post how to make a coil pot)
Clay beads
Clay beads are one of the easiest of the clay crafts kids can make. All they have to do is make many little balls of clay. Poke a hole in each one, paint when dry and then string. If you want them shiny,use acrylic paint with some kind of varnish.


Clay sculptures
I have never made sculptures with kids in a real way, even though I do want to try it so any directions I give you here is from things I have read.
Children first need to wedge the clay. This means to roll it first into a big lump, then roll it, tap one end, then the other end. Basically roll, roll, roll and then tap, tap, tap. This will make it a dense cylinder which is the first step in sculpting. Children need to learn how to pull pieces from their clay rather than make a bunch of small pieces and stick them together.
Of course, there will be times they will have to attach small pieces and in order to to that they will have to use slip. Slip is very soft pieces of clay that is clay mixed with water that works as a glue.It’s very mush, sort of like a goo. If you keep this slip in a tightly sealed container you can use it over and over again.
Another way to keep the pieces together is to make your finger a little bit wet and rub the pieces together once they are attached. In order to make sure pieces don’t fall off of each other is to help the children start their sculpting project with the cylinder. If they decide to do it the other way then they must make sure that their pieces are thick. No thin arms and legs as they will snap off when dry.
When adding pieces of clay to their pieces they will also need to score the clay. This just means making the texture of the clay more bumpy so that there is something to stick the slip onto. You can do this around the area you need to add the pieces by using a clay tool or a plastic fork or anything else you have handy. so score the clay, add some slip and then press the pieces together then add a bit more slip.
Children can learn to see what they want to make before they make it and pull away the pieces they don’t need to show ears, a head and other pieces. It will certainly take a lot of practice.
CLAY MODELLING TOOLS AND ACCESSORIES
Clay tools and accessories should not be given to children at the outset. They need to get really used to the medium and have had lots of experience with it before you introduce them to accessories. When you do, you do not only have to give them ones you buy in clay tool kits. You can give them scissors, toothpicks, plastic forks, plastic knives, cookies cutters, pizza cutters and any other kitchen utensils that you think they can use.
Sometimes the children themselves enjoy the cleanup process more than the clay playing itself.
Another point to remember is that children should be covered with smocks as it can get to be a very messy activity.
There are many art stores you can buy the gray clay and you will probably want to use the 5lb box if you are doing this at home. For teachers you will want to purchase the largest amount.
To clean up after a session with clay, you will need large sponges and a lot of water.
If you are the type that hates mess, then this type of clay is not for you. If you want your children to have a really wonderful art experience then you may want to consider bringing out this type of clay.
If you would like to know more about other kinds of clay then see my post about different types of clay that there are.
Have you tried sculpting with clay? If so I’d love to hear your experiences.
Pin to save for later


This is great. I have a B.F.A. in ceramics as well as teaching certification, in the fall I will be taking over as the elementary art teacher at two elementary schools in Wyoming. I am well aware of the therapuetic properties of clay but was still amazed that it helped to potty train that girl, really cool. No doubt kids love clay. Crayola makes a product called Model Magic it is not as plastic as regular clay but can be used to mix colors just like paint eg. yellow and blue make green ans so on, kids go crazy over the magic of color mixing and when you combine it with the joy of working with clay it is a very exciting proccess.
Thanks for your comment. I know kids love mixing. I do a kind of painting with them called tray painting, where they only get 5 colors, 3 primaries and black and white and they use a tray or aluminum foil to mix the colors for their painting. Many of the them in the beginning end up just mixing the colors and not even transferring them onto the painting they are working on.
I loved working with clay in high school. It was like a “zen” moment. I’ve yet to take a turn at with my boys. Mainly because I’ve seen how much of a mess play-doh makes. Yuck.
It’s definitely not for everyone. It is much dirtier than playdough and not all kids love it but, its such a wonderful, calming activity. You have to really believe in its benefits to use it.
What wonderful information!! Thank you for sharing at Sharing Saturday!!
Hi
Can you recommend a clay for baking or that you could make waterproof objects out of (such as a pot or vase)?
Hi
I spoke to a friend of mine who did ceramics professionally to get the answer for you.
What she said is that all clays are porous and are not waterproof. What makes a vessel waterproof is the heat of the kiln. You would have to fire it in a kiln, then put a glaze over it which is made from glass, and then fire it a second time. Only then will your vessel be waterproof
Thanks so much for the recommendations and projects. I love working with kids and clay and seeing their original creations! Usually I use kiln-fired clay because that is what I have in my studio closet, but for the younger kids especially the self-hardening clay sounds perfect!
I would love to use a kiln but, it’s never really been available to me
Just wanted to let you know that I linked up your post on my blog here: http://cottonridgehomeschool.com/2012/10/19/hands-on-beginning-handbuilding-pottery-lesson-for-kids-part-1/ and here: http://cottonridgehomeschool.com/2012/10/19/hands-on-pottery-lesson-plan-for-kids-introduction/. Thanks again, I love the ideas in your post!
Yup I already saw that and thanked you on your blog. Thanks again
Thanks for spreading the word on clay instruction for children!
I have been teaching clay for many decades and thought you would enjoy seeing my tutorial videos on unique clay projects for any beginner, even adults! Feel free to use the ideas and have fun!
https://www.youtube.com/user/ClaySensei
Hi, I am new to this clay use with preschoolers, one of my colleagues said, to use PVA glue to brush it with to preserve it for a while. Also does slick do much the same as PVA glue. We use the PVA then we paint it. Sorry we can not kiln dry the clay. Our children are making pinch pots and they decorate them with shells and they look great, just trying to extend them further.
I also do not have a kiln. I read somewhere on the web to have the children use oil pastels and then to varnish it. I tried that recently and it did come out pretty nice though not as shiny as they do when fired.
I am going to do Clay Sculpture for our Friday Club at my school. I feel more prepared now!
What is the best brand of clay product for kids to use? Also would you suggest air dry or oven drying?
I have never used oven drying clay myself actually so I don’t have experience with it. I use the airdry with my students and I buy them in the 25lb bags and usually decide by price 🙂 so don’t have a preference for brand.
Hi, i am going to be teaching beginning pottery at a homeschool co-op. How much clay, per child, would you recommend to start with? Thanks! Christine
I don’t do standard pottery as I don’t have a kiln but, when I do clay with the kids I usually give them about a grapefruit size piece to begin with
[…] a 3D opportunity to express creativity and imagination. For tips on easy clay techniques visit Clay Projects for kids or How To Sculpt Monsters | Sculpting Lessons for […]
[…] a 3D opportunity to express creativity and imagination. For tips on easy clay techniques visit Clay Projects for kids or How To Sculpt Monsters | Sculpting Lessons for […]
[…] There are also a variety of tools that can be used to create different textures in clay. These include paintbrushes, plastic forks, rolling pins, clay tools, and more. Pressing objects into the clay makes imprints. Kids can experiment with making patterns using different household objects (source). […]
[…] Another fun technique is coiling. To coil, roll clay into long snake-like pieces. Then, coil the snakes around to build bowls, vases, or other shapes. Coiling teaches fine motor control and problem solving as kids figure out how to attach and blend the coils (EduArt4Kids). […]