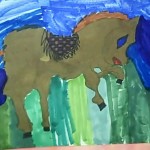
If you are looking for a method of step by step drawing for kids there are many ways to do so. There is a plethora of how to teach drawing to kids books all claiming to teach children drawing. Most of those methods though, replete with drawing lessons for kids do not really teach kids a method of how to apply the concepts they learn to new drawing activities. They may have pictures that kids have to copy for easy drawing for kids step by step but, only for the particular object they chose to show.
A while back I decided to try out the methods used in Drawing for Children by Mona Brooks. I had read how the Monart method really give kids the skills to learn how to draw anything they want to. In this post I am going to a small synopsis of how I did it. This should show you how it is possible to teach drawing in a step by step fashion.
This post is only a very small synopsis however, of the Monart method. As my own kids were growing up I had the book at home and was dying to actually go through the book systematically and teach the Monart method.
But, I procrastinated and procrastinated as I was very intimidated. I know it sounds crazy but it’s true. You have to read through all of the introduction and then the directions and get all the materials together. You know what I mean. When something looks daunting, you just don’t do it.
Then I got involved in Educational Art and I decided that this is the perfect motivation for me. I will get together a small group of kids which will give me the incentive to actually teach it. I finally did end up doing it and to help you learn some easy drawing for kids step by step I have here the first few lessons I did with the children along with some of their results.
The Monart method as taught by Mona Brooks starts by teaching children the 5 elements of shape there are in the world, like the chart I have below that I created from copying from her book.
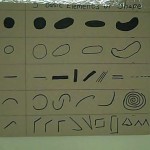
Before beginning the actual step by step drawing lessons I read through lots of points that break stereotypes of what I and many others thought about drawing in the past. I delineate them in my post in drawing for children.
Drawing lessons for kids
I am going to do this in a numbered sequential manner so they are actually like real drawing lessons for kids. This is not a comprehensive how to teach drawing for kids course, but if you read Mona’s book from cover to cover than you will certainly get much more than I can give you here in this short post.
I hope this post will help you dive into the book with confidence so you can teach your own children or students.
Step #1
I introduced the shape chart and we played some games like what items in the room are what shapes.After you get them used to the fact that a dot is a circle colored in along with the other shapes and their variations.
In the book there are then worksheets that the children get to work with to get familiar with the shapes and how to copy them. They are easily copied and enlarge on any copier and they run from the very easy, simple beginning shapes to more complicated designs to actual very easy simple drawings.
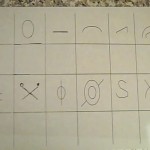
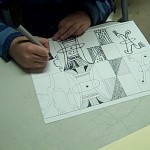
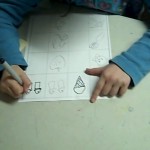
The children are to be told to do the best they can and not to obsess over perfection.
Step #2
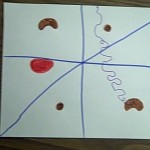
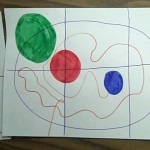
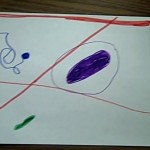
I then gave the children some free exercises where they had to follow my directions and had to make a variety of the elements of shapes on their papers.
The book has a number of these type of directions for you to give the kids for these exercises.
These are great because you can which children have a problem following directions and they also get to use their creativity as all of their pictures come out looking different.Of the 3 pictures below were all from the same directions.
Step #3
As we began the first real efforts at drawing objects, you need to notice that the Monart method uses very simple drawings for kids to follow. As they get more practice and skill you can move onto more complicated pictures as well. An easy bird is the first picture that Mona has her students work on.
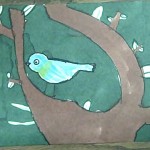
This type of drawing with children is really a kind of a leap of faith for me. I am a graduate from a very progressive graduate school that believes in children REALLY doing things on their own, and here I am giving exact step by step directions as to HOW to draw a bird. I did learn however, that the point of this method was that firstly many real artists, draw and get inspiration form other pictures. This in itself was a revelation to me since I always thought that real artist drew only from their own minds.
Another point I learned was that once you get the elements of shape down pat you can learn to draw anything. Learning to draw specific pictures helps you do that.
In the book Drawing with Children are the specific directions for each picture. For the bird they teach you to start with tee eye of the bird and then to continue up until the tail end. All of the pictures are first drawn with black, fine drawing markers.
I demonstrate the steps on a white board. If however, you working with 1-3 children you can do it on a large sheet of paper with the kids sitting around you.
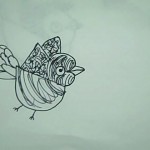
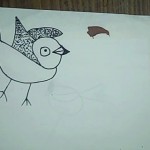
The kids get really amazed when they are able to this is and almost all kids can follow these easy steps.
The way things work with these particular drawing lessons is that the children get to basically follow these instructions but, there is lots of leeway.
They can make birds any size and can make more than one. They also get to make any kind of background that they want their bird or birds to be in.
step # 4
In order to give the children inspiration for their background I dug up some pictures of birds for them to get ideas from for inspiration. I actually called one of the calendar companies to see what they do with their old calendars. When I told the woman that I was an art teacher and needed them for inspiration, she sent me a whole box of old calendars, for free. In one of the calendars happened to be a whole bunch of beautiful bird pictures. I explained how they could take any part of these background or use something from their minds and can create their own backgrounds.
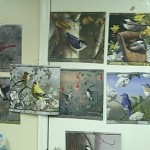
The book also teaches to use very good drawing markers for these projects which gives them very vivid colors. Below are some of our results.
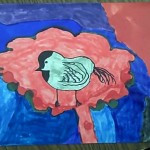
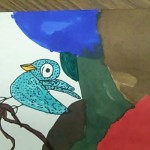
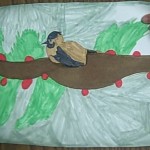
step #5
Drawing Leo the Lion is the next picture the kids get to draw.
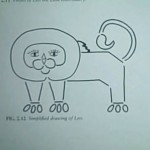
The kids were actually not so happy with Leo the lion. They insisted that it did not really look like a lion and they gave me a pretty hard time about settling down and trying to follow directions to draw him.
I tried explaining to them that we are just using Leo to learn how to follow simple lines and elements of shape but, they were not too convinced.
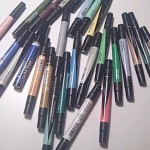
I tried to make them happy with the new Prismacolor Premier Double-Ended Art MarkersI bought for them to use for these drawing activities.
These markers are really thick on one side which allow the kids to cover their drawings with a lot of color. The other end has thin lines which they can use for more detailed work.
I also try to give children the the perspective that skies are not thin little pieces of blue across the top of their paper and that there is a lot more going on in their background than a piece of sky and a sun.
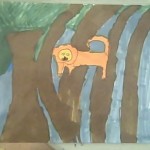
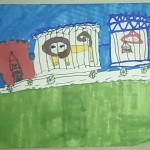
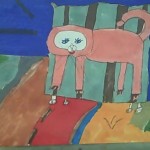
Even though they were not too happy with the activity of drawing Leo the Lion, we did manage go get some decent finished projects out of most of the children.
step #6
Mirror image drawings
As I saw some of the children were having some difficulties with getting even pictures I decided to give them the mirror image activities. In the book you will find pictures to copy that help children make the same part of a picture as a mirror image
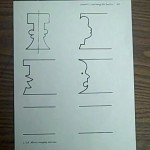
The book starts with much easier practice sheets then shown above but, they can progress as they finish the easier ones. The more they practice drawing mirror images the more sophisticated their drawings will become.
step # 7
The last step in our drawing lesson that I am going to share with you here is the drawing of a horse, which seems at first quite difficult to draw.
It really is amazing that my small group of 7-9 yr olds are really able to copy lots of these images. This activity concentrated on a carousel horse as shown below. Mona Brooks showed a finished carousel horse and a bare bones one
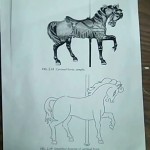
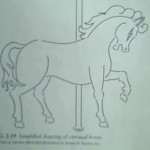
I chose to hone in on the bottom one and the kids chose to make real horses as opposed to carousel horses.
It’s really interesting how things develop. Usually I have been following Mona’s directions by drawing on the marker board and having the kids copy me. This time they asked me for copies of the picture so they could copy it. I gave them each one and worked much better like that.
This leads me to believe that they are not necessarily following the shape alphabet as much as Mona describes in her book but just plain copying.
Which bring me to another interesting thought.
As a child I did lots of copying from pictures. Whenever my mother complimented me I poo poohed it saying : “It’s only copying”. It’s only from going through Mona’s book that I realized how much drawing is based on copying.
I was so affected by my progressive Bank Street colleg training that it is still a bit hard for me to accept the fact that ones needs to learn to coy well in order to learn how to draw.
Below are 2 images of horses are just some basic copies the kids were able to make right off the bat.
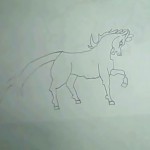
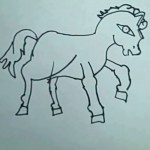
As you work with the children it is important to keep going back to the book because there are many instructions there that teaches you how to teach the kids how to fix problems and move on.’
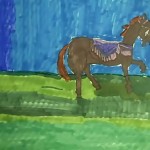
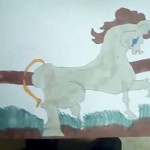
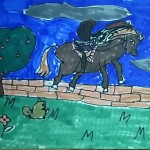
The child that made the horse jumping over the fence made a mistake behind the horse and used a techniques we had learned about creating something out of mistakes to make what she said was another horse.
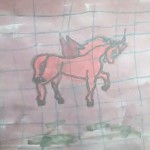
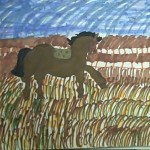
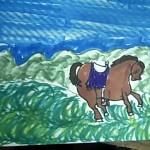

The little girl who made the horse above was having a very difficult time and I worked with her individually. she could not get the leg on the right to the right proportion and it wasn’t until I was trying to sleep one night when I remembered that I should have given her guiding dots to use. If I would have told her to show me where she wanted the leg to end, make a dot there and then bring it down. that is one trick that Ms. Brooks talks about in the book.
That is a basic beginning rundown of some beginning easy step by step drawing for kids that you can try. If you do it, I’d love to hear about your results in the comments box below.
If you wanted to take a break from realistic drawing then check out some of these abstract drawing ideas for kids that will help you add to your drawing curriculum.
I’d love to hear what your experiences have been with trying to teach drawing to your children or students.
Pin to save for later



Thanks for sharing. I’ve had the book several years and have felt intimidated to start as well. What you wrote has encouraged me to get going!
Thanks for the encouragement Ginger. I’d love to hear how you make out with it.